In the AS-A2 project we explored different artists and there style of working. I learned a lot during that time , you can present an image in a variety of different ways such as cutting into it and popping it up in the style of Markus Kisson. This was a simple way of bringing your photo to life but the subject matter u decide to cut influences the end result of the image.
I was taken by an artist called Curtis Mann who bleaches coloured photographs using various techniques such as dipping the entire print into bleach then rinsing it under water, you see the image transform before your eyes as parts of it wash away and you are left with a surreal image with the effects of the bleach reminding you of fire and heat. I experimented in this style by bleaching prints but I first painted clear nail varnish over parts of the image i wanted to save & left it to dry. I then emerged the whole image into the bleach and the parts i hand covered with nail varnish remained whilst the rest dissolved off of the paper. I also dipped a cotton bud in bleach and used it to work into the image this gave me more control over my enhancement of the image. I really enjoyed this process and thought i would use it towards my final piece.
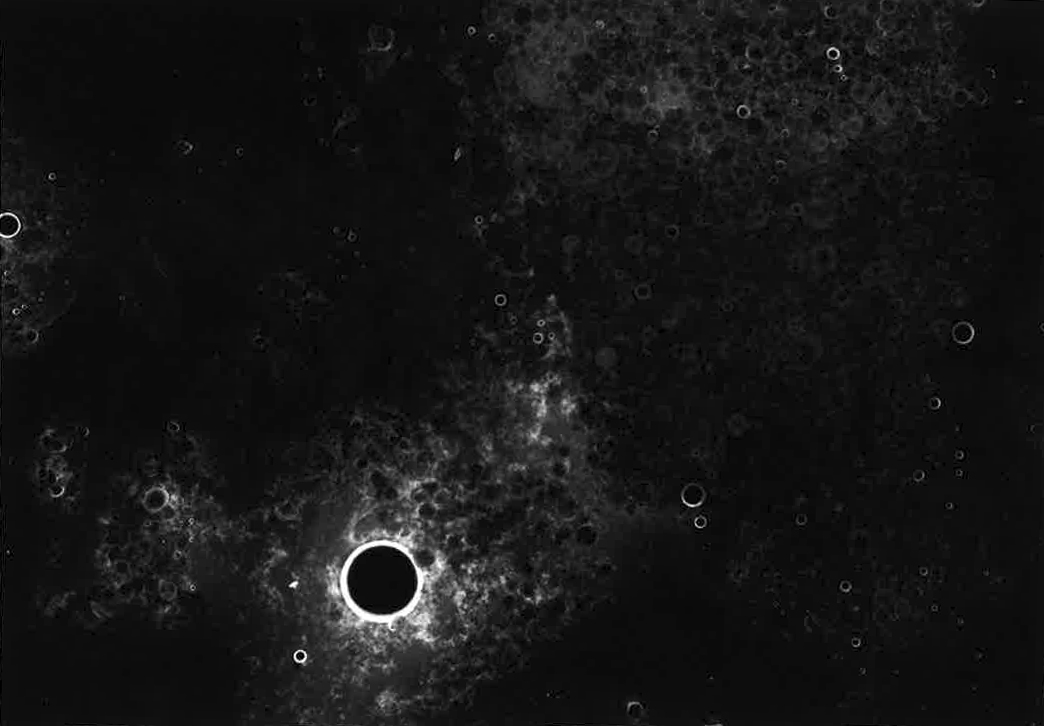
I experimented with pinning holes through images taking inspiration from Amy Friend and this is definitely a pathway I am going to go down to enhance my final piece. I found them so dreamlike and magical, not all of her images are her own some she bought or found but I really like a photo in particular which seemed to have been taken from a low angle. Definitely something i would consider using in my work.
Digital Manipulation on photoshop was one of my favourite experiments as you are not very limited as to what you can do, if you make a mistake you can undo it without having to start again from scratch. It is a very convenient way of working. I really liked how i was able to develop my own style from gaining inspiration from various tutorials and tweaking then to create my own way of working that i felt was suitable for my images.
Toning prints I experimented with using darkroom prints and food dye and also digital images and photoshop. I preferred the use of photoshop as I could easily change the opacity to suit my liking and also it wasn't such a messy job, when using the food dye it was sticky, dust dryer onto the food dye and left the darkroom prints looking messy which I did not like.
Handmade negatives wash an interesting angle to create prints from but I feel that it wouldn't go well with my theme unless i sandwich printed my handmade negative with a camera negative to create a something really interesting and different. I used sugar washing up liquid and food dye to create mine and i was surprised at how good they looked. Once putting the concoction into the negative carrier and enlarging it it reminded me of crystals and diamonds the sugar looked very nice.