Before
After
Photoshop HDR effect - Tutorial Link
I used adobe photoshop to manipulate my original photo to gain the High Dynamic Range effect. I adjusted elements of the photo such as the highlights and shadows which bring out extra detail, midtone contrast is a setting that contributes very much to the overall style of the photo so I raised it up to about +50. I heightened the radius of the image to give it a more blurry effect. I also added a desaturation layer and then changed the blending mode of the layer to overlay, changing the blending mode helped add saturation to the photo. The colour balance tool comes in handy to add warmth to the image and give it more vibrancy. I really like the effect created but think to improve it I should photograph landscapes with more form and structure, using the rule of thirds in my pictures would definitely improve the outcome further.
Before
After
The ultimate lomo effect - Tutorial Link
I raised the temperatures to give the image a warmer feel then duplicated the layer incase i made any mistakes. I feathered the lasso tool at 250pixels to give the selection a softer edge. Using adjustments layers is one of many ways to manipulate the levels and curves which give the selected area the vignette effect by deepening the shadows. I then cross processed the red, blue and green curves by adjusting them to my liking, i brought the blue up to give the weather more depth and contrast, i also increased the red give the sea front more life. As the layers i was working with were building up i merged the layer to make it clearer and so i wouldn't loose any of my adjustments. I brought down the saturation and made a new layer then painted it grey, i added grain to the layer then changed the blending mode to overlay then adjusted the opacity of it to make it have a more realistic effect. I also blurred the edges of the photo to bring more focus to the centre as the land is the focal point. The lomography effect is my favourite because I find it visually pleasing, it also works really well with my theme and it gives the photos a vintage effect that is not very common with the wide range of digital photography available. I could improve by doing a series of landscapes with a running theme of buildings which makes it more urban.
Before
After
Instagram Nashville Effect - Tutorial Link
I do not like how this worked out, it could definitely be improved by further adjusting the levels, giving it more contrast and heightening the saturation. I duplicated the layer incase of any mistakes then i used a beige colour and filled a new layer and changed the blending mode to multiply. I then adjusted the curves but i think this is were i made the mistake of using to much green in the curve, it took away too much vibrancy from the image, i should of raised the red curve higher to give the image more balance as this looks quite flat. Using a better image with more light and subject would definitely improve this.

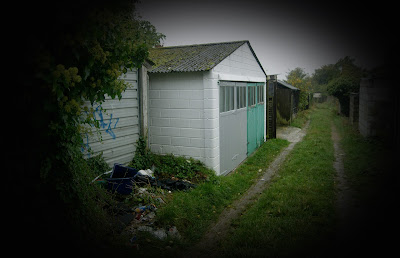
Using the elliptical marquee tool i created an oval then i inversed the selection and filled it with black. I then used the filter option and used the gaussian blur to blur the edge giving it a softer look. I could have improved this by brightening the photo and raising the contrast as in the process of adding a vignette it has masked the original photo and made it more dim, also because I made the selection freehand the vignette is not even so next time I will use a grid. I do like the effect, i could next time experiment further by creating the vignette in various colours.

Vignette Effect Tutorial
Using the elliptical marquee tool i created an oval then i inversed the selection and filled it with black. I then used the filter option and used the gaussian blur to blur the edge giving it a softer look. I could have improved this by brightening the photo and raising the contrast as in the process of adding a vignette it has masked the original photo and made it more dim, also because I made the selection freehand the vignette is not even so next time I will use a grid. I do like the effect, i could next time experiment further by creating the vignette in various colours.


No comments:
Post a Comment